Recent Articles
- Couvillon or The Burgoo of the Bayou
- Saving Time With An Instant Pot
- Easy Things To Pressure Can
- Food Names Used Wrong
- Makin' Ice (Countertop Ice Machine)
- Contesting Colcannon
- Let Us Not Forget Funger
- And Then There Is Haggis
- Eat The Weeds
- There's Never a Recipe for Burgoo
- Myths About Sugar, And Why It Is NOT Bad For You
- Why I Will Never Buy an Excalibur Dehydrator
- The Backlash of a Low Salt Diet
- Its So Healthy But I Just Don't Like It!
- ENOUGH With the Cauliflower Already!
- Medicinal Herb and Supplement List
- Black Forest Loin Ham (Dry Cured)
- Glutamate Isn't Evil, Here's Why
- Wheat Berries Fast and Tasty
- Don't Bother Buying a Waterbath Canner
- I Do NOT Need an All American Canner
- Reducing Liquid Loss in Canning
- Canning Hash
- Guide to Buying a Grain Mill
- Salt Curing Meats
- Differences Between a Freeze Dryer and a Dehydrator
- Canning Tamales - Yeah!
- Using a Pressure Canner as a Steam Canner
- Apple Scrap Uses
- What Do I Do With Oranges and Peels
- EASY Rabbit Jerky
- Abandoning the WAPF Ship
- More Than Cranberry
- Differences Between Lamb and Mutton
- Sweet Potato Myths
- Medicinal Clay
- Rancid Olive Oil
- Where is Weston A. Price's Traditional Fermented Cod Liver Oil?
- Paleo Diet's Flawed Premise
- About Sifting Flour
Real Food Heritage
-
Wisdom from Food Heritage
-
Chemicals In Our Food
-
Domestic Meats
-
Wild Meats
-
Dairy
-
Fruits
-
Vegetables
-
Eggs
-
Grains
-
Nuts and Legumes
-
Mushrooms
-
Wild Foraged Foods
-
Grow Your Own
-
Pickling and Curing
-
Supplements
-
General Health
-
Moods and Behaviors
-
Food Myths
-
Earning from Real Food
-
Heritage Preserving
-
Seasonal Eating
-
Politics of Food
-
Healthy Oils
-
Healthy Proteins
-
Healthy Carbohydrates
-
Real Food Recipes


Click to Download Your Free Heritage Pickling and Culturing e-Book Now!
Instant Download, NO Registration Required!
Heritage Preserving
Traditional preservation does not actually include canning, but we have included it here, because of the value for preserving seasonal harvests in a simple to use manner.
- We DRY a lot of foods. This is probably the most common traditional preservation method, being used for fruits, vegetables, and meats, and naturally occurring with grains, nuts, and legumes. We don't freeze dry, it is neither economical, nor efficient, and we simply do not have the time or money to fuss with it.
- We FREEZE a lot of foods. Also a traditional method, freezing was used by northern civilizations to store some foods through the winter.
- We COOL STORE some foods. The traditional is a root cellar. We use a basement, or a refrigerator, and sometimes a front or back porch area. Appropriate for potatoes, apples, cabbages, squash, onions, and other similar crops, and for smoked or cured meats.
- We CURE, PICKLE, or CULTURE some foods. Traditionally this is why we have pickles, kraut, cheese, ham, sausage, and other foods that are treated with salt or aged in a way that encourages beneficial microbial growth.
- We SMOKE some foods, in combination with drying or curing. Another longstanding traditional preservation method.
- We DO SOME oil or fat pack foods, but are careful about what we do, because some either do not store long enough to be worth the trouble, or they have too high a risk of deadly peripheral contamination to be worth it.
- We CAN many foods, a lot of them pressure canned, for quick fix, grab and go meals, and to make some meats more digestible (production breed meats are hard for me to digest unless the proteins are changed by cooking processes, and high heat is one thing that works). We are careful about methods used, and pay attention to nutrient loss. We use MANY "not recommended" methods, because our experiences have taught us that the government is not the only, or even the best, arbiter of safety where food is concerned! We use recommendations from around the world, and we learn the science, and figure out WHY things are tricky, and then develop methods for compensating. Our food is good, it is safe, and it is a huge benefit to us every day.
People have been preserving and storing food for as long as they have been eating food. Healthy food preservation is part skill, and part art, but once you get going on it, it really ISN'T all that hard!
Easy Things To Pressure Can
Some things are a pain to pressure can. And you certainly cannot do everything you want. But there are a few things that are SOOO easy, you might as well do them, for the benefit they provide.
1. Raw Meat. Meat is SOO EASY! Cut it up, shove it on the jar RAW, sprinkle a tiny bit of salt over the top, and put the lid on. Bung it into the canner and run the cycle. Easy to use for quick fix - fast and TASTY meaty gravy, fry in skillet with little butter until the meat juice is evaporated and use for pulled brisket with some BBQ sauce on it, fry in skillet same way and put taco seasoning on it, and lots of other really fast uses.
2. Cooked Meat. Very fast, we do this on Thanksgiving and Christmas, THAT DAY to preserve the turkey so it does not get stale tasting. Cut it up, throw it in the jar, add water, and you don't even have to add salt if it is commercial turkey or chicken or other meat that has been injected with brine. Works with cooked pork, beef, whatever.
3. Leftover Soup. Make a BIG pot. Serve it for dinner. Put the leftovers into jars, and can right after dinner. You'll have that delicious homemade soup whenever you need it. Nice way to maximize your cooking time. Don't do this with FLOUR THICKENED foods, it will taste mealy.
4. Chili. Again, make a BIG pot of chili, serve it up for dinner, and can the leftovers. As long as your chili is lightly soupy - in other words it doesn't heap up, it tips sideways in the jar instead, you can can it without fear of it not getting hot enough inside. Just can for SOUP times.
Now... REMEMBER!!! If your soup is HOT then put it into HOT water in the canner. If it is COLD, put it into COLD water in the canner. Warm is the same. Otherwise you may kill your jars with thermal shock. Not fun cleaning THAT up.
These four things ABSOLUTELY JUSTIFY the existence of my pressure canner.
Remember, you can waterbath or steam can in a pressure canner also, so this one canner is ALL YOU NEED!
Contesting Colcannon
Cabbage and Potatoes. Have you ever EATEN cabbage and potatoes mixed together?
Try it.
You WON'T like it!
As a side dish, IT STINKS. Often literally if they have overcooked the cabbage and it has all gone to a sulfurous ill wind.
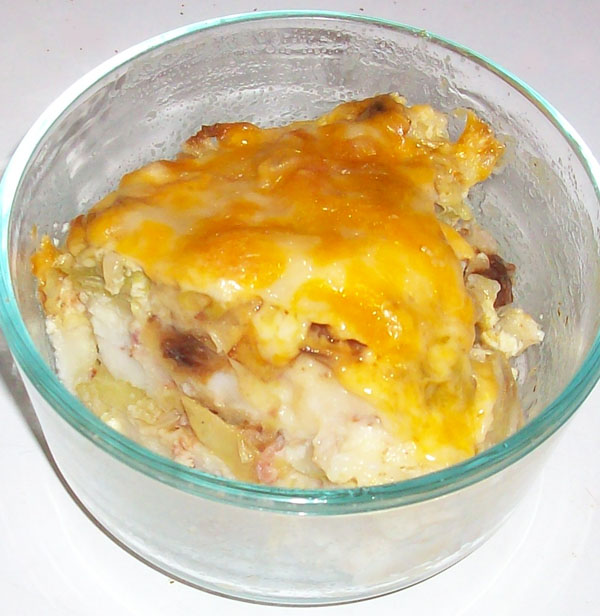
But here I am, eating Colcannon for the first time, and ENJOYING it. It is a delightful surprise. And yes, I am having this, for lunch, even as I write.
But there are myths about Colcannon.
One is that it is just cabbage and potatoes, and if you are desperate, perhaps it is. (But if I were that desperate I'd eat them separately.)
Colcannon is NOT the poverty dish that Burgoo or Haggis is. But Colcannon is the thing you always have. It is the staples that GET YOU THROUGH The winter.
Colcannon is made of the Preserved ingredients that you use from all winter. The cabbage that lasts until early spring, and the potatoes that HAVE to last all winter long. It has CURED meats, because they store in the attic for many months of winter. It is WINTER food. If they ate it on St. Patrick's Day, they did so because that is what was left at that time of year, of their winter food.
So cabbage and potatoes it MUST have - unless you are one of those weird people that substitutes Rice or Noodles for the Potatoes, or one of those sorry beings who thinks turnips are food, and uses them IN or INSTEAD OF the potatoes. Sorry, no substitute for the cabbage.
Colcannon (Irish and Scots name for it, in Wales, Kolknyn), is now described as a Side Dish, and it isn't meant to be. It is meant to be the Entree. Often the entire meal.
It uses MORE ingredients than are often listed. It is a HEARTY meal when you make it right.
I suppose you want a recipe? Well, I have one. But it isn't the ONLY one.
Just so you can be discriminating, I'll tell you, it should have MORE than just cabbage and potatoes. It should have MORE than just cabbage, potatoes, and onions. And even more than just cabbage, potatoes, onions, and BACON!
It should be so loaded with nutrient dense food, that you eat it and feel satisfied.
So here is MY recipe. It was WELL WORTH making.
Olde Scots Colcannon (Given to me by an Old Scot of the Duncan Clan)
Potatoes
- 2 cups mashed potatoes (with MILK or cream, and BUTTER - LOTS OF BUTTER, and SALT)
- 2 TBSP bacon fat (Do NOT leave this out. Do NOT reduce the amount. Add MORE if you want, but NEVER LESS. It won't be Colcannon if you do.)
- 1/2 package (or more) bacon bits (or fresh fried bacon)
- 1/2 cup smoky ham pieces
Stir together.
Cabbage
- 1 small head of cabbage (should be LESS than the amount of the potatoes - I had a LEETLE WEE cabbage head.)
- 1 small chopped onion
- Optional seasoning salt.
Cook tender in butter. CAUTION... don't overcook the cabbage to gray mush that smells of dog farts. Please. Just keep it sweet and firmly tender.
Egg
- 2 eggs
- 1/2 cup milk
- Sprinkle of seasoning salt and salt.
Stir together.
Layer
Assemble into a casserole dish. Layer Potatoes, and cabbage, and pour HALF the eggs over. Repeat.
Cheese
Wensleydale Cheese is traditional, but Colby, and Cheddar are also frequently used. The funny thing about Wensleydale is that it was NOT a commercial cheese until recently. It was a COTTAGE made cheese, and other than being firm and crumbly, had no defining characteristics other than that it was made in the region and called Wensleydale. Even today, flavors vary widely between manufacturers. So Wallace apparently has a corner deli that makes their own cheese that he frequents.
Top the casserole with a good layer of cheese.
Bake
Bake at 375 degrees for about 45 minutes, or until the egg is set all the way through, and the cheese is melty and browned on the edges.
Serve With
Serve with fresh bread or rolls, and stewed tomatoes or baked beans, or green beans.
Optional Ingredients
- Other cured meats can be used. Smoked Sausage, or bulk savory sausage are good choices.
- Mushrooms may be added.
- Parsnips can be added in a separate layer.
- Carrots can be added with the cabbage (shredded and cooked with it)
- Celery can be cooked in with the cabbage.
Additional Notes
Part of the process of recovering from Crohn's Disease has been learning how to combine foods so they digest and metabolize more easily. The right food combinations can really help in both instances.
The first thing I learned was how to eat eggs and tuna again. Eggs need ketchup or salsa. Tuna needs relish or mustard. If I eat them that way, then I never have indigestion from them, and rarely have anything but mild diarrhea (instead of severe). I also learned to eat beans again - overcooked, and with tomato.
The common factor for meats being acids - fruits, pickles, etc. And cheese. Cheese also works.
Vegetables have been a whole different thing. They don't respond to fruits like meat does. They needed something else.
The first guess was fats. And fats it has been.
Butter, lard, bacon fat, coconut oil, and other fats. But mostly ANIMAL fats. Animal fats supply elements that vegetable fats do not.
And here we have Colcannon. We don't LIKE potatoes and cabbage together, because our bodies can't USE them without other things added.
The bacon fat in the Colcannon is more than just tasty. It is magic. When you put a bite of this into your mouth, your body knows EXACTLY what to do with it. The eggs, milk, cheese, and meat also help round out a more complex digestive and metabolic combination.
From Colcannon, we progress to other foods that are difficult to appreciate. I hear that overcooking, adding butter AND bacon fat, and adding a seasoning salt with MSG can even help people enjoy eating TURNIPS! I'll have to try it some day, when I can grow, or buy, a turnip. Because that is ONE VEGETABLE that I do not eat. So if combining THAT with something makes it edible, we really have a method going on!
So keep trying new foods. Keep trying old foods in new ways. The combinations really do matter, and flavor really does tell your body how to use it.
Irish Farmer's Breakfast
Put the cabbage and potatoes into a skillet, and don't forget the ONION, with bacon fat, or butter.
Add bacon, ham, sausage, smoked sausage, or other savory meat.
Heat and fry lightly.
Add EGGS, and stir in, cook through.
Top with cheese.
Remove from heat and serve.
Scotch Farmer's Breakfast
It can be ANYTHING with potatoes, onions and Haggis.
It can ALSO be potatoes, onions, and cabbage, with Haggis.
Remember, either way, you need SAVORY MEAT, and you top it with cheese.
It is fried in bacon fat, lard, butter, or even tallow or marrow.
And now we another version which has more flavor, but is also made with convenience ingredients.
Patchwork Colcannon
Follow the instructions above, but use these mixtures.
1. Potatoes - Use flavored instant potatoes, in the small packets. You can pick any flavor you love to use in this. Be sure to add 1/4 cup butter to this.
Use Bacon Bits, and SOME KIND of meat dripping. Bacon fat is best, but hamburger, lamb, pork or chicken fat, or even sausage drippings, will do just fine.
2. Cabbage - Use a package of coleslaw mix. Fry it in butter.
Try adding soy sauce instead of salt, for more flavor.
If you don't have fresh onion, and don't have time to reconstitute dried onion, sprinkle in some onion powder or granules.
3. Egg - same mixture.
4. Cheese - same as above. We use packaged shredded cheese.
Welsh Corncannon
This really is a thing! An old Welsh dish, reputedly a favorite of King Henry VIII, and John Lackland (King John III). People the world over love corn and potatoes mixed together, and this Welsh version is a classic.
Potatoes - Stir Together
- 6 baked potatoes, peeled and roughly mashed
- 1/2 lb cooked and crumbled bacon
- Butter AND bacon grease, enough to really see and smell
- Salt, with or without seasoning salt
Corn - Stir Together
- 1 can cream corn
- 1 can whole kernel corn
- 2 eggs
- Salt
Cheese
- 8 oz White Mozzarella
- 8 oz White Cheddar
Assemble in layers, with 2 layers each of potatoes and corn, and top with 1 cheese layer.
Bake at 375 for 45 minutes.
Let Us Not Forget Funger
A Funger Sandwich, we are to understand, is not an enjoyable thing.
It is a funny word, and one which has been all but lost in history. When we know what it is, we know why Tartan bought his friend the dog.
Funger. That stuff in the fridge.
That meal we didn't quite enjoy.
The one nobody really wants to eat as leftovers.
The thing that is CLOSE to being inedible from decay, but NOT QUITE so funky we feel justified in throwing it out.
Oh, nothing growing actual MOLD, because Funger is NOT FUNGUS. It is just GOING TO BE if we don't EAT IT FIRST. Not the "The Creature That Lived In The Refrigerator, Behind the Mayonnaise, Next to the Ketchup and to the Left of the Cole Slaw" that left Garfield in terror.
The whole guilt trip over wasting food that drives us to EAT THE THING we do not want to eat.
You know, FUNGER.
This is a word I have recently learned the meaning of. (Yes, I know. Keep your participles to yourself.) A word which ACTUALLY has APPLICATION in my life... and in my fridge.
Funger sandwich, not so much.
Funger casserole? Maybe.
A plate full of funger. It has happened.
But often, it is just chicken food.
Geez... I wish I had a pig.
(Yes... this really IS food heritage. This really IS a Native American word. An English derived one, but Native American none-the-less. I have this on good authority, from a genuine Native American.)
And Then There Is Haggis
"I like Haggis." she said, when I made a comment about certain things online being like Haggis, in a derogatory way. "It's just seasoned sausage. Tastes good."
I didn't believe her. But Haggis is like that. People hate it, or love it, and it persists. The mere mention of it, we learn from National Treasure, is enough to inspire outrage.
But it is a thing. And I learned that it is like Burgoo. It is a food for a REASON.
It is referred to variously as a sausage or a pudding, and for some people it has a lot of blood and oatmeal and a soft texture, and for others it is meatier, and firmer. So the claim goes both ways.
There are regional names for various versions. The typical Haggis is mutton (scraps and offal) stuffed into a sheep stomach, along with some blood, oatmeal, poultry seasonings or sweet spices, onions, garlic, and nitrates, after which it is boiled, baked, smoked, or hung to cook over a peat fire. It may be eaten fresh, or dried, depending on the type.
So with that, we need to understand there are variants.
It may not be a sheep stomach. Not everyone has one laying around waiting to be stuffed with the remains after you take all the tasty bits off the sheep carcass.
Long Haggis is stuffed into sausage casings - Hog, Sheep, Goat, Beef, or Venison. It just depends on what you HAVE that you have enough of. Just like Burgoo.
Round Haggis is a stomach that encases it, but it isn't always sheep. There is Pork, Beef, Veal, Goat, and Venison there also.
But it is the STOMACH that imparts a particular flavor to the Haggis. Like tripe. Either you can eat it or you can't.
The meat is usually Mutton. Now mutton can be pretty cheap because it isn't something everyone can choke down. It has a strong somewhat stale taste like old cooked beef. That's the lanolin. Sheep, you know.
Sometimes the meat is Lamb. Wool lamb still has a mutton flavor, though it is less intense. Hair sheep have a clean savory beef-like flavor. Very tasty and no lanolin smell to drive you off.
But in other areas, you might make it WITH, or FROM other meats. The same ones you get the casings from (casings are just cleaned intestines, you know). When you put other meats in, you either reduce or eliminate the muttony flavor that combines with the tripe flavor to make people who hate Haggis hate Haggis.
It usually contains animal blood. Some Scots tribes claim the blood of any enemy will do just as well, but we hesitate to encourage that kind of thing.
The blood is not always a binder, sometimes the blood is cooked, drained, and then the solids are tossed in. Makes the sausage moister and softer either way. Gives it a nice meaty and salty flavor.
Oatmeal is kinda a required thing. But sometimes you don't HAVE oatmeal, so you put in wheat flour, rye flour, or even rice if your bent runs that way.
The seasonings fall into three groups, as a rule - Savory, Sweet and Spicy, or Both.
They can run mild, or pepper hot. Depends on how bad the other ingredients are, I guess, and how much you need to numb your tongue.
Onions, Garlic, Parsley, and Nitrates are usually used, though there are some regions where Nitrates or Parsley are left out, and the onions and garlic are fairly spare.
But it is about what you HAVE, and what you need to USE UP.
Once you get that far, it is about how to make sure it does not spoil before you can use it all - hence it usually has some nitrates in it, though sometimes not enough to make it pink.
Sometimes it is smoked, and sometimes dried. Depends on where you come from, and what your parents taught you that normal consists of. And whether the peat fire was all you had to cook over, I guess.
My favorite recipe that I found (I did not try it, I just love the wording) is:
Highlander Haggis - Some kinda animal stomach, some kinda meat (nose to tail with blood), some kinda grain, whatever spices are left in the cupboard, salted (no nitrate), boiled or baked, sometimes sliced and dried, sometimes sliced and cased and dried - flavor could be anything
So you see, it can be just like Burgoo. Survival food. Hardship food. Something to eat from the ingredients that are left after you made all the things you really wanted to eat.
But I think it may be worth trying when I can get a large sausage casing. Because I sure as anything am not going to make the round Haggis in any kind of animal stomach.
Haggis and My Mother's Meatloaf
Turns out Haggis is not always stuffed. Sometimes it is loose, uncased, and baked in a loaf or fried in a patty.
Knowing this turns the world on it's axis. It shatters some people's concept of dinner, entirely.
I finally acquired a recipe for Haggis Patties.
Haggis Patties
- 3 lbs ground meat (beef, pork, venison, lamb, etc - usually more than one type)
- 3/4 cup oatmeal
- 3 eggs
- 1/8 cup dried onion
- 3 tsp McCormic Umami (if you have it) OR 2 tbsp Kikoman Soy Sauce
- 1/8 tsp garlic
- 1/4-1/2 tsp ground poultry seasoning
- 1/8 tsp ground savory
- several shakes ground bay leaf (if you have it)
- several light shakes of Accent
- several shakes of pepper
- 1 tbsp salt
My gosh! That's my mother's meatloaf! Only you fry this, in patties, and in butter or butter and bacon grease. Freeze the leftovers. Make gravy from the drippings.
But Haggis is just that kind of meatloaf mixture. In it's simplest and most popular form, worldwide, it works out to Salisbury Steak, or Swedish Meatballs. IF you put lots of mustard in it, they call it Frikadellen.
I make the Haggis Patties with bolder flavoring than my Salisbury Steak though.
Scottish people, even those that hate Haggis, hate it even more when you reduce it to a food that everyone likes.
The great thing is that the Traditional recipe is the one you like the best. The ingredients can be tinkered with all you like, until you come up with a combination of meat, seasonings, and fillers that taste good and disappear from the table when you serve it. THAT is the best of the Traditional Scots recipes.
Eat Smakalik!
There's Never a Recipe for Burgoo
I've written about Burgoo before. But not here. A more unappetizing pot of slop is pretty hard to imagine, but it does have its use and purpose.
If you look up recipes for Burgoo, you find that it is a precise mixture of three meats that are all dissimilar, typically including fowl, large red meat, and small game (the gamier the better, apparently!). It also includes specific vegetables, and suggests a wide variety is optimal. They seem to forget grains, but DON'T forget grains... they are an important ingredient!
What they don't say is this:
Burgoo is stone soup, without the stone. It is all the leftovers, none of which are enough to form a meal around, and all of which conflict with one another. It is the last of the food in the spring, the first of the weeds, and never enough to make anything, always unbalanced, and always eaten with visions of fresh food in mind.
You throw it in the pot, and cook it into submission - with the hope that if you cook it long enough, nobody will know what kind of stew it was supposed to be to begin with. Hopefully the ingredients will stop fighting by then. And it is always stew... not soup by then because everything cooks to mush.
But if you are in a survival situation, you may some day need to make Burgoo. The closest I've come is in considering adding a dab of leftover turkey rice soup to a smidgen of Aoudad stew. I've never had to cook it into submission.
I am assured that knowing you can cook it to merge the flavors may be an asset in my lifetime.
Long Ago, a Distant Relative Discovered the Value of Burgoo
"You need to learn how to make Burgoo." his mother said. She was putting things into a pot. Times were hard, they were down to the last, and nobody was going shopping. It was spring, and that was bad enough, since they were already measuring out the last and hoping it would be enough until the garden came in. Their home had been robbed of food the night before, and there was very little left.
She said, "The secret isn't in what you put IN, it is in the cooking.".
He watched, and helped, as she put in a jar of "molasses beans", a scrap of leftover chicken, a bit of tunafish with the mayonnaise, two slices of cut up ham, three wrinkled and sprouting potatoes ("They really should not be in here, for proper Burgoo." she joked.), a turnip, two beets, a quarter of a head of wilting cabbage and a small jar of spinach nobody wanted to eat for the last six years since it had been canned, and a little leftover applesauce that was edgy enough that nobody wanted to eat it, but it would be fine if it were cooked hot for a bit.
With nine people to feed, she knew it would not be enough. Two other family members brought in a fine parsnip, a chicken drumstick, a half pint jar of leftover peas, a cup of dry pearled barley (a thing to celebrate!), a piece and a half of dryish cornbread to crumble in - plus a pint jar of sugared sweet potatoes, and JUST enough flour to make nine small drop biscuits (she had a little bacon fat, some baking soda and vinegar, but no milk so water had to do). She passed up the jar of sweet potatoes - no matter how bad things got, she just could not eat those. That jar had been making the rounds of charitable food drives for about 15 years, and she wasn't about to break that tradition. She was pretty sure that it would make its way back to her at least another two or three times before someone opened it, tossed the sweet potatoes, and re-used the jar, since she'd had it returned to her cupboard four times already. She tossed a little bacon fat into the pot also, just to be sure it had enough fat.
She turned and said, "I really need a squirrel.". The pot was about half full, and a good Burgoo really does have to be pretty dense, you don't just top it off with water and call it enough!
His father said, "I'll go see what I can get." and headed out with the small rifle.
The young man went out to check the garden. Early spring, not much up, and last year's storage pretty well gone. You had to be careful. If you rob the early crops, you don't have enough for the year.
The garden had already been robbed. But just the lettuces and some of the cabbages. Nobody wanted the spinach, even fresh, and everything else wasn't edible as-is.
He skipped the new crops, and dug where last year's carrots had been. Nothing. The parsnip patch gave up one small and shriveled parsnip, and he struck gold in a weedy patch by the onions... Two large green onions, an inch around at the base, and a full 2 1/2 feet tall. You can eat ANYTHING in stew if you have onions! He found lamb's quarter, and Mom said to save that for tomorrow, along with the chickweed and plantain (that's just more spinach, you know!).
His father came back with a groundhog. We do not know if it saw its shadow or not. But Mom cooked it up in the pressure cooker, because groundhog needs a good long cook, and she didn't have time for that, and the cook time for Burgoo. Boned out, the groundhog and the broth went into the stew pot.
"You have to cook it into stew. You can't THICKEN it into stew, you have to just cook it down, till everything is falling apart, and the flavors blend." his mom said. "That's the secret to Burgoo. No matter what you put into the pot, if it is edible, you can eat it, and not mind, if you cook it good and long."
It wasn't good, he said. But it was ok. And it was filling. You didn't go away hungry. One brother complained, so did his wife. All the younger kids just ate, and nobody said a thing. It was just dinner.
The Mom said, "It was just STEW." Not any KIND of stew, just STEW.
And that is how Burgoo came to be, and why it survived, and then died out as a meal. We don't know how to survive a thin spring season anymore, and that is when Burgoo was traditionally resorted to. Not a meal you PLAN, or use a recipe FOR, but just something you fall back on because you HAVE to.
----------
The war was raging, and his troops were nearly starving. Supplies were short, and the Quartermaster was handing out one can of K rations per man, per day. This is an 8 oz can of SOMETHING. You didn't get to choose what you got, you just got SOMETHING.
He didn't have many men under his command, and they were all pretty grumbly about the lack of food. About the third day of restrictions he opened a can of SOMETHING. Now usually, you could tell what you got. It might be vegetables, it might be fruit, or even stew or a can of ham, beef, chicken, pork, or turkey, or even tuna if you lucked out. If you were not so lucky, you'd end up with an experimental meal that didn't quite work out, or something they called Bread. If you were REALLY unlucky, the can you got would be puffed, and the contents inedible or deadly - this was a regular occurrence, and you did NOT get a replacement.
This can of SOMETHING wasn't one of those. It took a while to figure out what it was. The label said "Lasagna", but it clearly was not that! There were three slabs of something solid which may have been meant to be pasta. There was a pinkish orange sauce, and a marblish sized lump of something unidentifiable which was probably meant to be meat. Our officer shook his head, and the man next to him said, "What are you gonna do with something like that?".
The man next to him then said, "I have oranges. Just oranges." There were always oranges. No matter how bad things got, for some reason there were always mandarin oranges. And mushrooms. You just can't live on 1 can of mandarin oranges or 1 can of mushrooms, for 24 hours!
And then he remembered Burgoo.
"Bring it all in, men!" he called.
Good men, they did.
He cut up the "lasagna", and tossed it into his cookpot.
He looked at the oranges, and handed them out, one to a man. One extra to the man whose can it had been.
Next, green beans. Then turkey. Then mushrooms. Two more cans of meat, three more cans of vegetables, one of "bread", And one can of questionable, but not totally inedible potatoes and gravy.
Every man then added 1 can of water.
Cooked it for about half an hour, and served it up. One and a half cans of stew per man.
Pretty good deal, his men thought. Other troops watched, would not share with one another this way. But his would. Eventually a few other troops buckled down for it. It isn't like it was a new idea, it was not. It is just that most would snitch so much before putting it in the pot, that they could not serve up anything fair at all. A few did manage, by requiring full cans from anyone who wanted to contribute.
Thing is, if you share, you get a miracle. From Burgoo. Or stone Soup. Or Smorgasbord, or Potluck, whatever you want to call it.
One can a day, and you never have enough. Your body has one thing to work with, so it works crooked every day.
One bit of this and that and something from all the food groups (except they never had dairy), and you get sufficient variety of nutrients to function, even if you are losing due to slow starvation. You can just hold out longer.
Sometimes, you need to know how to make Burgoo.
About K Rations
These were used from WW1 through the Korean and barely into the Vietnam Wars.
They began as open kettled foods, and as a result, the shelf-life was not very long. About every third can was puffed, and ranged from barely edible, to outright deadly. They progressed to waterbathed, but this was not much better for low acid foods, and some foods that have a short shelf life due to grain or dairy content.
My father said that if it smelled bad, you could heat it really well and it would be edible but not very tasty. If it LOOKED bad, you just tossed it, there was no reviving it.
C rations were pressure canned, and combined with other items into a kit which usually contained a spoon, a napkin, a match, a packet of coffee, 1 cigarette, 1 piece of gum, 1 piece of chocolate, 1 - 12 oz can of food (generally a meal), 1 - 8 oz can of fruit, 1 - 8 oz can of crackers (later a plastic package of crackers), 1 - 8 oz can of cheese spread or deviled ham. There were variations on this. This was supposed to be 1 day's worth of food for a soldier who was engaging in intense physical activity. When things were "good" they got 2 of these. When they were not, they didn't even get this. The fortunes of war brought hardship both from the enemy, and from theft within their own ranks, and hunger was a common visitor, and sometimes a permanent resident.
During the second world war, most places in combat had just K rations. Some packed fresh, some leftover from some forgotten time ago.
Now...
Open kettled foods that are high acid, and either high sugar or salt, such as pickles, jam, juice, and even applesauce, will store well about 95% of the time, for 2 years or better. So, while waterbathing is BETTER, those are fairly safe to can this way, though the seal is a little lighter, and they don't seal well at high altitude, and if you transport them to high altitude from low altitude, the seal may break.
Open kettle means they are heated to boiling, and put into jars and lidded immediately, with no further processing.
Foods which normally require water bath canning may or may not hold when open kettled. The spoilage rate is about 50% within 6 months. About half of that can be compensated for by cooking the food after opening it, though flavor and texture may be changed.
Foods which normally require pressure canning have a very high failure rate if open kettled, and even if they DO maintain a seal, they may spoil in a way which can be compensated for by heating well before consumption, or they may be so gross you can't even try that. Botulism is not the only risk, we have Ptomaine (affects pork and chicken principally), Perfringens, and a few others that are no longer well known.
Perfringens has several varieties, and can affect dairy foods, meats, vegetables, and grains. It is generally NOT deadly, but will change the flavor, smell, texture, color, etc. Cooking with high heat renders the food "safe" to eat, but not necessarily tasty. This is also true of Botulism (which may affect any low acid food), except that it IS generally deadly when not heat treated. High heat will still render the food safe to eat.
About half the food received as K rations was contaminated with some form of food poisoning, which troops compensated for by either heat treating, or discarding. About 10-30% had to be discarded when things got really bad.
And this is how developed nations fed their troops during earlier wars.
Of course, MREs are not much better. The rate of pathogenic food poisoning is lower, but the rates of chemical food poisoning are 100%.
NOTE: Get real, folks, this is not advice on how to can food. This is HISTORIC information on what was done, and how the troops survived. Besides, it is scientific fact... So go argue with someone else about your food preservation paranoia.
In other words, this is a legal disclaimer. Food poisoning happens, use your brain, and follow the rules.
As to the historic facts, this is according to what was recounted to me by people who lived it.
Why I Will Never Buy an Excalibur Dehydrator
I've been dehydrating foods for more than 40 years. I've experienced most kinds of dehydrators, from home-made, to no-heat, to no-fan, to temperature controlled.
I've dehydrated fruits, vegetables, mushrooms, meats, eggs, potatoes, herbs, leathers, various foraged weeds for animal feed, leaves for animal feed, fruit peels for animal feed, and a bunch of other things that the average person does not dry.
I can say with a strong degree of authority that ALMOST ANY dehydrator with a FAN and a HEATING ELEMENT is going to perform JUST AS WELL for 95% of users, as an Excalibur.
For those that need more, a heat control is ALL you need.
Excalibur is one of the most expensive dehydrators out there. And their customers RAVE about them.
But the fact is, if their customers had bought one of any number of less expensive dehydrators with comparable controls, they'd be JUST AS THRILLED.
I've noticed that the high price is one reason people tend to be OVER THE TOP TICKLED with a purchase. I mean, you spent THAT MUCH, you sort of have to justify it, right?
I began with a Ronco. That is, after I left home where my mother had us filling a homemade dryer every summer.
The Ronco is still out there - and it goes by several other names also. It was one of the first round stackables, and remains the lowest cost dehydrator out there.
It has NO FAN. Heat rises, and it has fairly large vents on top.
It isn't good for high moisture foods, and you do have to be careful not to overfill it.
I used it for about 6 years, and it did just great for apples, not so well for peaches, ok on pears.
When I upgraded I bought a $30 dehydrator from Wal-Mart.
It was almost the same as the Ronco, as it was a round stackable, but wider, with slightly shorter shelves, and IT HAD A FAN! After using the Ronco, I knew that was the ONE feature I just HAD to have.
That little dehydrator, along with its twin that I bought a few years later, kept us going for about 10 years. I loved them because they'd do apples overnight. So every night I'd cut a batch of apples to dry, and in the morning we'd bag them up. I raised 7 kids, all fairly close together, so dried fruit never stuck around long.
I was given a replacement after one of those two died.
It had a ROTATOR. If you set it up right, it rotated. If you did not, then it burned everything. I learned that the hard way. Once the rotator was functioning though, the thing was wonderful, and dried everything nicely. It had a fan and a single heat setting.
That one was stolen. Seriously.
My next food dryer was a cooling rack, set on a cookie sheet, and placed under a ceiling fan. Really.
I then set up a rack system for three cookie sheets, with a little fan blowing across.
PURE AIR drying. And it worked GREAT, for mushrooms, herbs, and other small or low moisture items. It was SLOW, and it just could not handle the volume of higher moisture foods I wanted to dry.
I started to get desperate for a faster dryer, so I bought a Della that looked bigger than it was, and the thing was $70.
Do not buy a Della. They have no warranty. And they need one.
The thing died SIX WEEKS after I bought it. SIX WEEKS of temperature decreasing, then going cold, then no life at all.
So next, I bought an $80 food dryer. EIGHTY BUCKS!!! But it had a temperature setting, and since I was doing some things with mushrooms, it seemed a good idea. I don't regret it.
About this same time, we were living with my mother. She has an Excalibur. The nine tray model. The $200 model.
So she's drying with that, and I'm drying with my $80 Open Country rectangular dehydrator.
They hold about the same amount.
They are both made of plastic.
They both have a fan.
They both have heat, and time, settings.
Hers has fan blown heat that blows across the trays.
Mine has a fan that blows UP through the trays.
Hers has a cabinet that holds nine trays.
Mine has a base with six large stackable trays and a lid, plus two height extenders (good for incubating things in bowls or pans).
Hers has a thin rigid black plastic tray framework with VERY wide holes (about 1 1/2" diagonal), that won't hold any food, with a plastic mesh sheet over it - think needlework plastic mesh, the kind we all make tacky crafts from. The tray flexes diagonally and does not feel strong.
Mine has a white plastic tray type shelf, with 1/4" wide holes in about 1/8" thick plastic. It is really strong. Mine has the SAME kind of plastic mesh as a liner for very small foods.
Neither one has a leather tray. We make do with teflon sheets, parchment paper, or small 1/8 size bun pans.
They dry equally fast, except when I overload mine. I do that. It works. It just takes a little longer.
Mine can do ONE THING hers cannot... A stackable adjusts to the amount you are processing. If she wants to do ONE TRAY, she has to heat the whole cabinet. If I want to do one tray, I heat ONE TRAY. Stackables are flexible like that.
The thing is, the materials are the SAME.... All plastic.
The controls are the same - time and temp.
They work equally well.
The flexibility is in favor of the Open Country.
The price is in favor of the Open Country... LESS than HALF the price.
Now, I've heard that Open Country dehydrators are now more costly. But the fact is, ALMOST ANY dehydrator with temp controls is going to work JUST AS WELL as an Excalibur.
Some may not LAST as long. This is why I say ALMOST any dehydrator with a fan and heating element!
So when you ask what brand dehydrator is good, you can be assured that dozens of people will pop up to tell you that you just HAVE to spend $200 on an Excalibur or you might as well not bother.
Please believe me when I tell you, buy a dehydrator that costs LESS than $50 for your first food dryer!
Just make sure it has a fan, and you WON'T be disappointed.
And don't bother saying, "Some day, I'll get an Excalibur!".
If you really want to move up, go for size, or stainless, or something that really matters.
You'll have all that savings to smile about!
Black Forest Loin Ham (Dry Cured)
- 2-3 lb chunk of boneless pork loin (can sub beef, venison, mutton or other for "dried beef" style, as long as it is the loin so the size and thickness are right for this recipe)
- 1 cup sea salt
- 1 tsp ground black pepper
- 3/4 cup sugar or maple sugar
- 1 tbsp Morton tenderquick
- 1 tbsp ground juniper berries
- 1 tbsp crushed rosemary
- 1 tsp ground marjoram
- 1 tbsp minced garlic
- 1 tsp ground coriander or few shakes of nutmeg
Mix the salt, sugar and seasonings together.
Rub with mixture, make sure surface is heavily salted (as much as will stick to it), and get the salt into any cuts or pockets - actually all I do is sprinkle it on using a spoon.
Put into a zip bag.
Refridgerate for 5 days, flipping once a day, draining and resalting as needed (if you can no longer see a good coating of salt crystals on the surface, then re-salt - I resalted about every other day).
Scrape off salt (you can leave some herb bits on the surface, just no salt clumps), and refridgerate overnight OUT of the bag (I did it with a rack on a cookie sheet, and the hams set on the rack), and then either cold smoke, or apply liquid smoke wash and then let dry overnight again in fridge (omit this if you cold smoke it). (You may also use smoked salt in the initial curing process, at a rate of 1/4 cup of smoked salt per cup of regular salt.)
(Cold smoke if you have a smoker. Traditionally smoked with pine wood.)
Apply melted fat casing (brush on melted lard, or coconut oil). Let harden. Wrap in fabric to keep bugs off then hang. (Some people don't bother wrapping it, it depends on the risks in your home and region. I wrap in old t-shirt fabric, and then hang in a net bag which I crocheted out of white bedspread weight cotton, but pillowcases are also popular.)
Hang for 2 weeks (big hams hang far longer, this is a thin loin ham, so it is fast).
(Cure times lengthen with larger hams, and smoke and hang times are also longer.)
Don't Bother Buying a Waterbath Canner
The ONLY canner you need, is a pressure canner. It does it all.
Most people buy a waterbath canner, learn to can in that, and then buy a pressure canner. But you really don't NEED a waterbath canner if you have a pressure canner.
You can waterbath jars in a pressure canner, the same as you can in a waterbath canner, if you like. If you want to save time, you can use the pressure canner as a steam canner, and your life just got a whole lot simpler!
Ok, so a pressure canner costs a bit more, but it is worth paying the extra, to save money long term (if you are able).
When you choose a pressure canner, get one that allows you to stack jars, if you can afford it. Something as large as an All American 30 or 41 quart canner is HEAVY, and BIG, and presents problems of its own, so make sure you research well before you get something that big, make sure you can lift it, and the stove can handle it, etc.
I recommend a Presto 23 qt. It is a roomy canner, very easy to use (easier to use than an All American), and has a good manual (save you the price of the Ball canning book since it has reprints from it). There are many other canners of this size also, and it is a nice size to work with. You can stack pints and smaller, but not quarts.
You DON'T have to have the canner filled to run a cycle. You can run partial loads, and it is faster to do, because it takes less time to heat up and cool down, so it won't waste energy to do so. Ends up about the same running a partial load in a large canner, as it does to run a full load in a small canner.
You can STACK jars if you are using the canner as a steam canner, or pressure canner. You really CAN'T stack jars in most waterbath canners, the water just has to be too deep.
Skip the waterbath canner, just get a good Pressure Canner, and learn to can according to your comfort level. It is a great skill to learn!
I Do NOT Need an All American Canner
I would never buy an AA, nor would I recommend one. Funny, because three years ago, it was on my want list!
My mother had one, and I used it when I was younger, and I HATED pressure canning, it was so fussy and demanding. I thought it HAD to be that way. Imagine my surprise to learn that it doesn't.
I bought a Presto 23 qt. It has changed my opinion of pressure canners, irrevocably. It is so easy to use that it has opened a doorway for me, and I don't dread canning low acid foods. It is the only canner I own - I use it instead of a waterbath canner also (I steam can with it). I never put it away, it gets used so often.
Seven reasons I won't buy an AA:
1. I cannot justify the cost. I have a Presto, 23 qt. It does everything I need, and I do mean EVERYTHING. I use it for WB, and Pressure canning. I use it on average a couple of times a week for one or the other. The cost of it is so much lower (about 1/4 the cost), and the quality is excellent. If my Presto canner gets damaged, replacement isn't going to wipe me out either!
2. An AA is just too heavy. The only advantage an AA has is that some models can have a larger capacity, but the larger capacity AA is so heavy loaded I cannot move it, even to slide it across the stove. I can move the Presto, and it is about as heavy as I can move. The AA is also so large that I would feel guilty doing smaller batches, don't feel that way with the Presto. My mother's AA was so heavy loaded that it damaged the burner on the stove. The largest AA is also tall enough that it will not easily fit under all stove hoods.
3. I live in a rental with a glass stove. The Presto is made for glass stoves. It has a drop plate in the bottom so the contact surface of the bottom of the canner does not overlap the burner edges (WARNING!!! Do not EVER use it on a small burner, ONLY on the larger ones, or you lose the protection of the drop plate.). The AA is flat bottomed, and traps the heat on the burner, which can cause overheating and cracking in the stove top (there are warnings about it).
4. The Presto has a gasket. If the gasket wears, I can replace it. The AA has a metal to metal seal, and it needs to be handled carefully to avoid denting the edges. If the sealing edges on the AA are dented significantly the canner is ruined. You can't repair it, and you can't replace a part to salvage it. You can replace the lid, but it costs as much as a Presto canner to do so. If you are worried about a damaged gasket interrupting your canning, just keep a spare on hand.
5. The AA has a gauge, and no weights, so you have to watch the thing through the whole cycle. The Presto has a gauge and a weight, and you can get a three piece weight for it if you need pressures other than 15 lbs (comes with a 15 lb weight, I'm at high altitude, so I'm good). I can HEAR this canner from any room in the upstairs of the house. I can hear when it starts to steam, the safety latch pops up - time to put on the weight. I drop the weight on, and then go back to my other work. When it is up to pressure, the weight starts rocking and makes a different noise, and I know it is right. I turn the heat down (I've learned just where to turn it), and set the timer. I can HEAR whether the pressure is steady or not, and if it starts to drop, or goes too high, I hear it. I NEVER have to sit and babysit a canner. It just works SOOOO easy.
6. If I end up needing larger capacity, I'll simply buy a second Presto canner. It is far more flexible than one huge one, and even with two, I'm still at only half the price of a single AA canner. You don't gain as much time as you'd think with a larger canner, since it takes so much longer to heat up, come up to pressure, and then cool down. I've timed this. Light loads in a large canner work almost the same as it does with a smaller canner - with a single layer of jars, the canner heats up in about 10 minutes, comes to pressure in about 8 minutes, and cools enough to remove the weight in about 15 minutes. With a full double decker of pint jars the same canner takes 20 minutes to heat up, 15 minutes to come up to pressure, and about 35 minutes to cool enough to remove the weight. So bigger canner, longer times involved. Might as well use two canners, and keep them both going for a smoother work load.
7. I never spend time fussing with getting the lid to seal with the Presto. AA metal to metal seal is fussier to get seated right, and to get an airtight bond. A rubber gasket just does the job more easily. To seal an AA, you have to get the lid level (not always easy to see), and tighten down the toggle bolts on opposite sides, and then proceed around the canner, one side, then the other. If it is not level to start, you will get steam escaping the edges, and you have to cool the canner, release the lid, and start over. A small annoyance. But one that just NEVER happens with canners that have gaskets! You just put the lid on and twist, and you are done!
I use this canner for waterbath canning also, except I use it as a steam canner for that. How to use a pressure canner as a steam canner.
Funny thing is, the only pressure canners I'd ever used were my mother's old Maid of Honor (an old Presto that was branded for Sears), and my mother's new AA. Both had gauges you had to watch. I was leery of a canner with a weight, silly me. So I had the AA on my list of "someday I really want".
I had decided that even though it was a hassle and I hated it, I needed to can meats. Growing your own, you just need to be able to preserve it in many ways. I simply RESIGNED myself to what I thought was the inevitability of watching a canner to ensure that the pressure stayed level for two hours at a time! (Time including coming up to heat, and coming up to pressure, and the meat cycle for quarts.)
I bought the Presto simply because I could not AFFORD an AA, and the Presto was the biggest canner with a gauge that I could afford at the time, and the AA is now permanently OFF my want list.
Best purchase EVER.
That canner has been the most amazing blessing to us. Three deer this year (one Kevin shot, and two were given to us, one wrapped, one not yet skinned), and most of the meat is going into jars. I did bone broth from the bones of the first one (won't from this current one, it is too gamey), and made soup and chili.
Last year my sister gave us extra garden produce and a lot of apples. This year I have a lot of squash, and had quite a bit of garden produce from various sources. It is either dehydrated, or canned, depending on what it is. I now have a storage room with a healthy food storage, where 2 years ago we had no food storage at all (long story, this was NOT usual for us), and the vast majority is home canned.
And all of the canning done when I was not even in the room while the canner did its thing. I put it on the burner, leave the room, and listen for the latch to pop so I can put the weight on. Then I ditch out again and just listen for the weight to start rocking so I can set the timer. Adjust the heat, leave the room and wait for the timer to go off. Turn off the burner, and walk away until the latch drops. My ears can monitor the whole process from another room in the house. I never thought it could be that easy!
For many years I could not handle canned foods, but I've healed enough that I can now, and canning has helped me avoid many processed foods, replacing them with my own quick meals in jars. Some meats I can digest better when pressure cooked, and I handle beans best when they are well cooked under high heat.
The Presto 23qt canner has taken pressure canning from a dreaded task for me, to something simple enough to use on a regular basis, throughout most of the year.
NOTE: Mirro makes a 22 qt canner, that has only a weight, and no gauge. Many people love this canner, but it does not hold quite the same number of jars as a Presto 23 qt. The Presto holds one more pint jar, and may not hold even 7 quarts if your quart jars happen to be a bit wider than a Kerr (the Presto 16 qt is also roomier). It is considered to be an easy to use canner though, and is often cheaper in price.
----------
I was rather shocked to hear of lowering standards for AA canners. While I do not see the justification for the cost, according to the benefit for myself and the majority of home canners, I had no cause to believe that their quality was declining.
This article explains a situation I had not thought would occur: Buying and All American Canner - The Good, the Bad, and the Ugly.
Reducing Liquid Loss in Canning
Some people call this siphoning, but it isn't. Siphoning PULLS liquid. Canning PUSHES liquid. So it isn't siphoning. It is just liquid loss.
Liquid loss can lead to seal failure with foods that are oily, grainy, thickened, or which have small bits of herbs. If any of those things push out under the lid they can cause the lid to pop. This is the number TWO cause of seal failure. The number one cause now is just the lids. Quality has declined, and there are more lids failing.
I have found several factors that affect it, and that overall, you can avoid it about 90% of the time. The other 10%, either things just did not work out due to some unavoidable mistake, or there is just something about that food that is really finicky and you'll always have liquid loss, or the APPEARANCE of liquid loss.
Not all drops in liquid ARE liquid loss.
Some foods will absorb liquid during the canning process, making it appear that liquid was lost, when it was not. Old potatoes are notorious for this.
Some foods will swell a bit and rise up above the water line, and the water level will drop, again, making it APPEAR that there was loss when there was not.
REAL liquid loss is pretty much always an air or temperature change issue. And REAL liquid loss means the water in the canner will have some of the liquid from your canning in it, and will usually smell of the food. A significant odor of the food you are canning, in the kitchen, coming out of the canner during processing is a good indicator that some liquid has been lost.
I've tested and observed waterbath canning, pressure canning, and steam canning. I've had liquid loss with all of them, and when I canned like my mother said to can, every jar had some liquid loss, usually quite a lot - about 1" was average for quarts.
Since I've been canning as an adult, I've minimized that, and rarely have issues with it unless something goes wrong.
These are the factors I've isolated that have a strong affect on liquid levels in the jars during or after processing.
1. Fill level. If you overfill, they will lose liquid.
2. Heat up time. This affects it, but not as much as the cool down time. I heat it up a little slower than I could - I don't put the stove on Hi, but on about 7.5.
3. Cold or hot pack heat up time. If I cold pack, or I'm canning jars with cold stuff in them, I heat it on 7, even slower. I've tested this, and it makes a difference in fluid loss.
4. Cool down time. Do it slowly, if you rush it, there is more fluid loss. For pressure canning, or Steam canning, I turn off the burner and leave the canner on it (slower cool down that way), then remove the jiggler (for pressure canning - no jiggler with steam canning) when the pressure is down all the way. I then remove the lid and set it at an angle on top so the steam comes out, for about 5 minutes (no sudden air temp change on the jars), and then take the lid off and let it sit for another 5-10 minutes, and then remove the jars from the canner. For waterbath canning, never remove the jars when the water is still boiling. Cool it down some before you take them out. This ONE factor affects the liquid levels more than any other factor!
5. Overall canning time. The longer it is canned, the more likely it is to lose fluid due to boiling in the jar.
6. Residual air in jar or dryish foods. Some foods trap air between the pieces, so releasing that is important before you can up the food. Air expands more than water, so it pushes water out when it does. Some foods also are more porous and have more air in them to begin with. Peaches do that, so do apples, especially if they are older. Potatoes will absorb water during canning if you raw pack older potatoes that are not in prime condition (soak them in cold water for 2 hours before you pack them to avoid this).
7. Remember when canning food with FATS, that headspace must be increased by about 1/4" per TWO tablespoons of fat. Fats expand more than water, and will push out more. So give it more to begin with, and just DEAL with the extra headspace in the finished product.
You may never eliminate fluid loss entirely, but you can reduce it significantly with a little care.
Canning Hash
A rebel recipe for canning hash in a pressure canner.
One of the easiest things I've ever done, once the food was chopped! I used a very basic recipe, but you can do this with pretty much any hash, since the timing is based on the timing of the meat (only adding corn would lengthen it).
- Potatoes (I don't know how much! I used about a dozen good sized potatoes)
Peel and dice them - I dice them small. I don't want to have to re-chop once I open the jar. Ok, if you like the peels, leave them on! - Corned Beef - raw or cooked, it does not matter, but raw will end up much more firm. I used about 3 lbs home cured.
Dice about the same size as the spuds. - Onions - I used one large
Chop fine
Toss all of that into a large container and mixed it all up. Pack into jars. As many as it takes. I recommend pints. They are easy to handle. Wide mouth is easier to get the hash out of, but I've done it in narrow mouth.
When I say PACK, I mean PACK. Fill the jar about half full, shake it down and then press the food in tighter. Add more, press, add more, press, until the jar is full. You can leave about half an inch headspace with this, because it does not siphon, it does not have enough moisture to do so (it will make enough to keep the food moist).
Pressure Can at 10 lbs pressure, adjusted for altitude, for 75 minutes for pints.
This is good fried after opening (in butter or bacon fat!), with an egg or two cracked over the top and cooked in after the hash gets crispy.
For Plaid Pajamas Hash, reduce the amount of potatoes by about half, and add carrots, celery, cabbage, green pepper, red pepper, and diced tomatoes (drained well).
Salt Curing Meats
This morning, after I got up, I tended to four pieces of meat, in the fridge, which are salt curing. 1 Maple Black Forest Loin Ham, 1 Boysenberry Rosemary Loin Ham, and 2 pieces of dry cure maple Hog Jowl Bacon.
The process is fairly simple, and using the process I use, the end product is only salty on the outside, richly flavorful on the inside, which is safe to eat raw like proscuitto, or which you can cook, and then use like wet cure ham. This is SIMILAR to a salt box curing, but you don't bury the meat in the salt, you just rub the salt on the outside, and for a shorter period of time, so the saltiness is greatly reduced. The secondary drying is done by hanging, rather than by salt.
Downstairs in the basement, I have two crocheted net bags hanging from a beam - one contains a Black Forest Loin Ham (no maple), the other contains a small Boneless Picnic Ham. (Which were, by the way, amazingly delicious.)
I use small meat pieces, boneless. This makes it fast to cure, and easy to handle, and more certain that it will cure well to the center. I cannot yet raise my own pork or beef, so I am using purchased meats, and loins, chuck, and other pieces are often on sale, and work great.
They get salted down with a mixture of kosher sea salt, sugar, spices, and a tiny bit of nitrates (I've done them without and they do not turn out as well), and put into a ziplock baggie. That goes in the fridge, where it is turned and drained daily, and where I re-salt every other day. After a week, or about the time they stop draining significantly, I take them out of the baggie, scrape or rinse the salt off (depending on the recipe and type of ham), and then let it air dry in the fridge for another week. It then gets cased in melted fat to keep it from drying too much, since we are in a very dry climate. After the fat hardens, I wrap it in a piece of clean old t-shirt fabric to keep bugs and dust off, and put it into the crocheted net bag to hang it. Some people just hang it with a meat hook without a covering, but it is very dusty here, and bugs can be a problem.
It hangs for about 2 weeks (for this size meat pieces), and then we get to use it. They can continue to hang while parts are used, you just cut off what you need and leave the rest hanging.
I do dry cure instead of wet cure because it takes less space, and after the initial curing phase, can move out of the fridge and be stored for several months.
We DO have a cool basement, which helps, since you don't want it at a high temp where it hangs. You can cure it initially without a fridge but it is riskier, they used to cure them in the smokehouse in the cool fall temps.
The end result is complex, mellow, salty enough to satisfy the palette but not overwhelm it. Amazing meat!
Differences Between a Freeze Dryer and a Dehydrator
The dehydrator can dry many foods, but there are certain ones that don't work well. A freeze dryer can dry those foods, but it is a more complex process. These foods include strawberries, blackberries and raspberries, and a few others which simply do better freeze dried instead of dehydrated.
Information for this article has been gathered from the manufacturer website, home freeze dryer users, and from other sources for general food storage and freeze drying facts. We find that user experiences do not match the manufacturers's claims in many instances, actual user experiences are not nearly as optimistic. This is common, manufacturer data tends to be based on ideal situations, whereas users are often operating in less than ideal circumstances.
A dehydrator shrinks the foods when drying them. The freeze dryer retains them at close to the normal size. So dehydration is a more compact storage method, freeze drying is just lighter in weight but does not save space.
A dehydrator is a simple piece of equipment. It has a fan and a heater. The more complex ones have a timer and temperature control. You can get one that will work really well for about $40. Some people spend more - but I have not been able to find a reason to do so, other than wanting one in stainless, or needing white plastic instead of transparent plastic (which off-gasses less and irritates my lungs less), because the cheap ones worked just as well as the expensive ones (I have used many kinds), as long as they have a fan in them. A decent sized one (with 5-7 trays) will do 5-10 lbs of food, depending on how it is cut and how it is organized. I can do 10 lbs of apples easily in a 6 tray model.
A freeze dryer is a complicated piece of equipment. A small one is about the size of a washing machine (Ok, so they have smaller models now, but not a lot smaller, and they all have an external pump that is pretty good sized that you have to have room for also), but the drying chamber is about the size of your average small dehydrator (it can process 5-15 lbs of food, depending on the size of the unit, according to the manufacturer). It takes a LOT of space for the amount of food you get out of it. It is more complicated to use, and FAR more costly. They are finally down to around $1500 for those small ones (thousands more for bigger ones), they may or may not come down more, because they are simply a complex piece of equipment.
A dehydrator requires no maintenance, and very little in the way of troubleshooting. They are simple to operate, simple to clean up, simple to figure out how to adjust. You generally have an on-off switch. Some have timers, some have heat settings. That is as complicated as it gets.
A freeze dryer is a different thing entirely. It requires maintenance after every load, requires oil and frequent oil changes, has multiple parts and complex settings, gaskets that fail, filters to maintain. Parts break down regularly, or need replacement for maintenance regularly. It operates with a computer panel with multiple settings to adjust, and if things are not set properly, the cycle does weird things. There is a learning curve, and if you don't adjust and work things correctly, it can get messy (as in, oil leaks, or misting oil out of the pump vent - report is that the newer ones don't have the misting problem). Troubleshooting a batch that didn't dry well is a common occurrence, and involves some knowledge of what went wrong, and how to adjust to compensate.
A dehydrator is fairly economical to use. The heating element does not use a lot of electricity, nor does the fan. Foods dry typically overnight, or in 24 hours for high moisture foods.
A freeze dryer can take 72 hours per batch (generally takes more than 1 day), and uses freezing, vacuuming, heating, and fans - it can run through multiple repetitive cycles of freezing and drying for a single batch. It uses more energy to operate, and each cycle is quite a bit longer. Enough that if you are running the thing with back to back loads for weeks (many people do), you are going to see the difference in your electric bill (the Harvest Right company lists operational costs at about $1.20 to almost $3 per day in energy usage - multiply that by the number of days you think you'd use it per year, and remember that many things take more than 1 day). Many people pre-freeze the food, to shorten the cycles, and if you do that, you always need to have room in your freezer for the trays also. The company says that the unit notifies you when the food is done, but reports from users suggest this feature is far from perfect, and troubleshooting is a common occurrence.
A dehydrator has a small fan that produces some noise. It can be in operation anywhere in the house and not be a disruption.
A freeze dryer is fairly noisy. According to Harvest Right (the maker of home freeze dryers), it is as loud as a "noisy dishwasher". You are going to want to have a place to put it where the noise will not bother you.
Dehydrated foods rehydrate fairly predictably. They rehydrate better with hot water, and are easy to rehydrate during cooking time just by adding extra water to a recipe.
For the most part, freeze dried foods also rehydrate predictably, except there are some foods that just don't rehydrate well. Some foods that people WANT a freeze dryer for (mac and cheese, for example) do NOT rehydrate very well if they have much sauce on them. They have this kind of funky styrofoam and glue thing going on. The outside absorbs moisture, and thickens up so much that it prevents moisture from getting to the inside. So the outside is saucy, then gluey, and then the inside is still crunchy or stiff and clumpy. Even commercial producers struggle with this issue. So Yeah, you CAN freeze dry some things that you would not generally dehydrate, but the end results are not exactly what you wanted.
A dehydrator has a heating element, and a fan, and sometimes a time or temp control. Those are fairly simple, and you don't really have an issue with parts needing replaced. It is simpler and cheaper to just replace the unit, and since you can get a good one for under $100, if it has to be replaced every 10 years or so, it is no big deal.
A freeze dryer has a LOT of parts to malfunction. And according to users, they do.And they are not cheap to replace. A LOT of people are giving positive reviews right after they buy, and updating later to say they are having a lot of problems. The machines wear parts - I don't know all the parts that are involved, but there are some that regularly need replaced, others that wear and break on a high percentage of units, and some that just wear out under high use, or that are flaky under certain situations (climate, usage types, etc). This is one of the top reasons for dissatisfaction.
The argument is made that freeze dried foods store for 15 to 20 years. Some do, some do not. Higher fat foods won't store as long. I've seen (and eaten) freeze dried foods after 20 years. The color has paled, the flavor has gone stale or bitter, and some of them no longer rehydrate as well as they do when they are fresh. Very similar to dehydrated foods, but the dehydrated foods that I've used after long term storage have actually been in better condition.
Dehydrated foods store just as well, and for just as long, but take WAY less space. Those foods that do not dehydrate well do well with other preservation methods - berries generally can well or are wonderful in jams, preserves, and syrup, and they can be made into leathers and used in many ways.
I've also eaten home canned foods that were 20 years old (we look for color changes and texture changes, as well as indications of spoilage - where there are no significant indications of the food breaking down, it is safe to eat - storage conditions radically affect storage life), and they were in as good condition as the freeze dried foods, sometimes better. Storing home preserved foods in a cool, dry, and dark environment will dramatically increase storage life, whether you dry, can, or freeze dry, and storage conditions generally have a greater affect on storage life than the method you choose.
Dehydrated foods rehydrate best with hot water, and are fully rehydrated in about 30 minutes if they are pre-cooked, longer if they are not. They CAN be rehydrated using cold water, it will take several hours, or overnight, to do it though. They are simple to use if added to meals in progress, and allowed to cook along with the fresh ingredients. Other dehydrated foods are commonly used dry for tasty snacks.
Freeze dried foods are less popular for snacks. The initial feel when you put them on your tongue, or if you chew them right away, is kind of squeaky crunchy. But they go to goo pretty fast, and don't really end up having the intense flavor of dehydrated foods, because the flavor is not concentrated. They rehydrate BEST with hot water, but can be rehydrated with cold water, and generally rehydrate faster than dehydrated foods. Thicker freeze dried foods will not rehydrate well into the center, and those with sauces will often not rehydrate well, because the outside absorbs the water, and then the sauce keeps the water from penetrating well into the center of more dense pieces of food. They have their place in emergency storage where heat is limited.
I can find no justification for the incredible cost and energy usage, and fuss and bother of a home freeze dryer. I have limited physical energy, and extremely limited finances, so I have to be very careful where I use those resources, and want to be sure that whatever I do, I am getting maximum value and results for the expenditure. Other methods of preservation are running rings around freeze drying in terms of economy and simplicity!
I heard someone say, "You can freeze dry ice cream and have ice cream all year even if you have no freezer." Well, that's just silly, of course you cannot! Freeze dried ice cream is not ice cream. It is styrofoam type candy! It is not cold. It cannot be rehydrated back into ice cream! It is just a novelty, not in any way essential or even relevant to what it started out as!
I have noticed that many people who get a freeze dryer are not doing it for practical reasons, but because they are enchanted with the idea of freeze drying everything in the house. I know many canning addicts also, who will can things just because they CAN (pun intended). I've never been that way, I want to know that my effort is necessary or beneficial, and if it is not, I do not do it! Freeze drying is too costly and time consuming for me to do just for a trendy hobby.
If you are thinking about one, I suggest you join a group on FaceBook or elsewhere for using a freeze dryer, and see whether it still sounds like a manageable thing. If so, great. If not, don't apologize, just walk away!
I used to think I wanted a freeze dryer until I heard people talking about actually using one. I no longer have any desire to own one!
Canning Tamales - Yeah!
Canning Tamales!
First, the education part. Because if you don't GET this part, you can have a disaster.
Tamales EXPAND during the canning process.
It is VERY important that you not over-fill jars, and that you pay attention to the headspace required. If you have too little headspace, the tamales will push out of the jar, either causing a lid to bulge, or causing the corn flour to escape during processing. If the corn flour pushes out of the jar, you end up with a mess in your canner, and failed seals. The seals may LOOK good, and then pop a week or two later, when you aren't paying attention, causing loss and spoilage.
Tamales need liquid, and absorb liquid during processing or cooking. So the sauce ratios need to be followed also. You start with watery stuff, you end with sauce.
If you do it right, you get nice plump tamales in a jar, with a nice chili sauce around them. If you do it wrong, you get blown lids, messy jars and canner, and no liquid on the tamales.
This is like canning dry beans. Smart people can manage it.
Canned Tamales
(I don't know EXACTLY how much it makes, I just filled the jars until I ran out of ingredients. I got four jars and a few extra tamales to cook on the stovetop to sample.)
RECOMMEND Wide Mouth Tapered 1 1/2 Pint Jars! If you use Pint jars, you have to make REALLY short tamales.
You also need EITHER Parchment paper, OR Corn Husks. Parchment paper is a little more compact, but the softer inner corn husks will also work well.
SOAK corn husks for about half an hour in warm water when you are ready to assemble the tamales.
Ingredients:
Filling:
- 1 lb beef (can be a solid piece, or chunks, whatever)
- Mild peppers (such as Anaheim or green chiles) - you need about 1, cooked and mashed
- Sprinkle of salt
Wrapper:
- 3 cups Masa Flour (find this in the Mexican Food section, it may be called Tamale Flour, you want the Corn flour not meal)
- Salt
- Chili Powder (I used about 2 tsp)
- Cayenne (optional)
- Black pepper
- Onion or garlic powders (optional)
Sauce:
- 1 cup V-8 or Tomato Juice (do NOT substitute sauce it is too thick)
- 1 cup water
- 1 tsp chili powder
- 1 tsp onion powder
- 2 shakes cumin if desired
- pinch garlic granules
- 1/2 tsp salt
Cook the beef until it is tender and pulls apart. Shred it and add the mild pepper. Toss to mix.
Put the Masa Flour in a bowl, and add about 1 tsp salt, and 1/4 tsp pepper, and the chili powder. Add a sprinkle of cayenne if you like.
Add cold WATER to make a sticky dough. It should hold together, and you should be able to spread it out flat.
NOTE: You want the Masa Dough to be STICKY, and SPREADABLE. If you can handle it or knead it like bread dough, it is TOO DRY. You should need to spread the dough with a spatula or knife, or the back of a spoon. It handles sort of like brownie batter. If it is too dry, it can cause the jar lids to pop because of the expansion of the increased flour amount.
MIX the sauce ingredients together - I used a jar so I could pour it into the canning jars.
If using Parchment Paper, CUT pieces about 6" X 6" (or a smidge larger).
Assembly:
Lay out a piece of parchment paper or a corn husk. Press out some of the dough in a rectangle about 3" X 4", in one corner of the husk (on the wide end) or paper (go 3"X3" if you are using pint jars). The dough should be about 1/4" thick, or a little less.
Put a bit of beef down the center, the long way on the paper or husk.
Roll the tamale up (so you get a 4" long tamale for larger jars, or 3" for pint jars), and fold the bottom end of the paper or husk up.
Place the tamale into the jar.
IMPORTANT!!!
Make your tamales narrow!
They need to be about 1" in diameter when finished! Do NOT go bigger! You can play around with the thickness of the dough (thinner dough) to get more meat in it if you like, but don't make a bigger tamale.
Place FOUR tamales into the jar. NO MORE! They will expand to fill the jar! There should be lots of wiggle room around them.
Make SURE that you have the FULL AMOUNT of space above the top of the tamales! This is vital!
1 1/2 Pint Jars - 2" headspace above the top of the tamales.
1 Pint Jars - 1 1/2" headspace above the top of the tamales.
They GROW! They will expand during canning, and then shrink back down just a little, you will need every bit of headspace.
FILL the jar with sauce, up to the little seam line just below the bottom lip on the jar - you need a full 1" headspace for the sauce. The tamales should be covered in sauce. (Yes, the headspace for the tamales is DIFFERENT than the headspace for the sauce.)
Process jars in a Pressure Canner, for 90 minutes for pint and a half jars, or 75 minutes for pints. Standard pressure adjusted for altitude.
If you are feeling Festive, you may press 1 olive into the meat in the middle of each tamale.
Enjoy!
WARNING!!!
DO NOT USE home milled corn flour for this! Use ONLY commercial corn masa flour. Home milled will have the germ in it, and this means YOU WILL GET PERFRINGENS food poisoning in the jars. You can SMELL it, and it does change the appearance of the food if it gets really bad, so killing yourself with it is pretty difficult to do, but you don't want to waste food this good by using an ingredient that is guaranteed to spoil.
This risk is VERY LOW for commercially milled corn flour, and EVEN WITH HOME MILLED, perfringens of this type takes about 3 months to grow sufficient to be detectable in the food, and it is NOT DANGEROUS unless it really has time to go to town on the food. This is the SAME kind of perfringens bacteria that causes Salt Rising Bread to rise, and has a cheesy odor when it is fresh, but goes to gray and nasty when it overgrows.
A Coddiwomple Farm Original Recipe!
SHORTCUT METHOD
You can use commercial frozen tamales and can them instead of homemade! Who knew?
Now, this kind of Tamale is already PARTIALLY cooked, but not fully. They are always kind of crumbly instead of firm like they should be.
They only need 1 1/2" headspace above them. They WILL grow up and out of the corn husks. They should JUST fill the jar when they are fully canned.
So...
- 6 or 8 THAWED frozen tamales (the large ones)
- 1 large can Tomato juice, seasoned as instructed above.
Put TWO tamales in each jar.
Distribute seasoned juice between them. It won't entirely fill the jars.
Add water to the bottom of the lip on the jar.
Pressure can for meat time.
Using a Pressure Canner as a Steam Canner
I only own one canner. It is a good one, a Presto 23 qt Pressure Canner, which is large enough to double decker pint jars, and even tall enough to can half gallons, or to use as a water bath canner with the actual recommended water coverage.
This canner does everything. But I don't use it as a WB canner. Too much water, too much time heating the water, more of a hassle filling the thing.
I use it as a steam canner. (For those who are unaware, steam canners ARE approved for canning in the US by "official" sources. Look it up, I don't have time to cite sources.)
A Steam Canner is used in place of a Water Bath canner. It uses hot steam, instead of hot water, to heat the jars and process them. Steam canners use the SAME TIMES as Water Bath canners. Using your Pressure Canner as a steam canner can save you the cost of the steam canner, and you can even avoid the cost of a water bath canner also if you like.
To use a pressure canner as a steam canner, follow this procedure:
1. Add 1 more quart of water to the bottom than you would add for pressure canning. For my canner, this means 4 quarts instead of 3 quarts. You need a little more water since it will steam the whole time, instead of having the steam contained. In all the times I've done it, 4 quarts has been more than enough. See the note below for cautions.
2. Put the jars in. Stack them if you want. Water does NOT need to even touch them (if you are stacking), because they will be surrounded by steam that is actually hotter than the water.
3. Put the lid on like you normally would, lock it into place.
4. Turn on the heat. I start it on high.
5. Wait until the safety latch pops up. (The safety latch will not pop up until there is sufficient steam pressure inside to lift it, and it won't do that until all the air is exhausted, so it is an accurate indicator for starting the time for steam canning, or putting the weight on for pressure canning.) If your canner does not have a safety latch, then wait until it is steaming hard through the vent.
6. Start timing. Use the NORMAL time for Water Bath canning. DO NOT PUT ON THE WEIGHT. Just let it steam. You can turn the heat down, just make sure it stays steaming hard (you will hear the water boiling inside and the latch will stay up).
7. When the time is up, turn off the burner. (Move it if you want to - I don't, because I have a heavy canner, on a glass top stove - the Presto 23qt that I have is made to be safe on glass tops.)
8. Let it cool until the safety latch drops, or until it is no longer steaming visibly.
9. Go ahead and open the canner and remove the jars. (If you are having problems with liquid loss, let the jars cool a little with the lid set on at an angle for about 10 minutes before removing the lid entirely, then let them cool for another 10 minutes before removing them from the canner.)
CAUTION: Don't use this for things that need to process for more than about 45 minutes unless you add another quart or two of water. I've done things that took 30 minutes, and it still had a lot of water left in it.
You want to make ABSOLUTELY SURE you do NOT use this as an "alternative" to pressure canning.
Not only is it just better to pressure can if you have the equipment to do so, you risk running it out of water on long steam cycles. That's bad, it can crack your jars and crack or even melt your canner - generally it will at least warp the bottom, and that IS A RISK for having the canner crack during a pressure cycle in the future.
HOW DO YOU KNOW IF IT RUNS OUT OF WATER? You won't see or hear steam coming out, you won't hear boiling, and the safety latch will drop. After a bit, you will smell the smell of hot metal (possibly combined with the smell of burning food residues if the jars have leaked any liquid) - not a nice smell to have in your kitchen!
If this happens, turn off the burner and MOVE THE CANNER off the burner, and let it cool down COMPLETELY, without disturbing it (you cannot tell how hot it is inside, and if you open the top too soon you risk cracking the jars from sudden exposure to cold air). Once it is completely cool, remove the jars, check the canner for warps or cracks, check the jars for damage, etc. If it is still usable, fill it again, but use MORE water, and try again.
IT IS MOST IMPORTANT that you DO NOT run water into the canner until it is COMPLETELY COOLED. Running water into the canner while it is as hot as it gets without water in it, can warp or crack the canner, and if there are hot jars in it, it can shatter the jars.
The chance of this happening with a normal canning run is pretty well impossible. So don't get all worried because I put this in there. I'm just putting it in there for those who might use it improperly, or for those who wonder what the chances are that it might run out of water and what would happen if it did!
If food residues get burned onto the canner, it may stain it badly, and you may need to scrub it with an SOS pad, or fill it with water to the top of the stains, and then add a few cups of vinegar to the pot and boil it for a while.
Now... If this has EVER happened, you'll need to watch the canner in the future, and be alert for progressive warping of the bottom of the canner.
If the canner has run dry at any time, the heat on the bottom is higher than normal during the disaster, so the bottom can kind of start to round out a bit instead of being flat. If that appears to be happening, it is not safe to use it anymore as a pressure canner.
There is a small possibility that it could crack during a pressure canning run if it has warped due to abnormallly high heat exposure, and this is no small thing. Also listen for atypical sounds during pressure canning runs, and respond quickly (this is something we usually do anyway, it is kind of instinctive).
That's a lot more detailed than I'd normally be, but hopefully that will answer all the questions anyone has.
I've been doing this for probably 40 years, since I started doing it when I was in my teens in my mother's house. I've never had an unfortunate episode with it, in any way whatsoever. It has been a very efficient and easy way to waterbath high acid foods.
Apple Scrap Uses
I LOVE fresh pressed apple cider. The sweet full flavor of undiluted apple cider, with nothing but natural flavor! I think it is one of my favorite things in the whole world. Right up there with pizza, and chocolate. And it is one of the things that helps my kidneys and liver function better when I get over-toxed by fragrances or chemicals.
So I got 10 lbs of apples. I do not have a real apple press, I have only a little centrifuge juicer, ironically and rather sadly named "Little Giant", because while it IS little, it is in no way a Giant. It was made to make a cup of juice in the morning, with no thought to the fact that the little beast is pretty difficult to clean for just one glass of juice! So I wear it out juicing 10 or 20 lbs of apples at a time, emptying the cup every two lbs, and scraping out the built-up pulp every four lbs. It is a slow task if you have a lot to do.
The PULP. All that pulp. Not quite devoid of juice, because the juicer, like all constant feed centrifuge juicers, spits out a stream of pulpy juice over here, and glops of juicy pulp over there. Not as efficient as it could be, by any means.
Still, it is all I have, and all I am likely to have until I can possibly afford the $250 juicer I REALLY want.
It bothered me so much, all that waste. Maybe it would not have if I had a REAL juicer that really extracted all the juice and left behind a sort of sawdusty stuff that smelled faintly of apples. But this pulp in this juicer was too much to be comfortable tossing to the chickens, the apples just cost too much for that.
So I came up with a plan.
The peels and seeds, and bits of sharp core, that pass through the juicer when you run apples whole, prevent me using the pulp for any kind of people food. So I determined that I MUST peel and core the apples first. It is more work, but if I can get an extra batch of food from it for the effort, then it is worth it! Let the chickens and the rabbits have the cores and peels! They enjoy them. I do not!
So I peeled and cored the next batch of apples, determined that I would make something of the resulting pulp. The juice was, as always sublime. Enough to last me a few days. It wasn't enough to can it. But it sure was good!
The pulp comes out with a few thin slices of apple in it, here and there, but it is mostly a fine pulp. Kind of smooth and finely mushy in texture. And utterly flavorless. So whatever I did, I was going to have to add some FLAVOR.
First, I tried making apple butter from it. To do that, I had to add a LOT of water to it, to get it stirrable, so it could cook down - it was simply too thick to do so without burning otherwise. The key to a really good apple butter isn't in the seasonings or the sugar, it is in letting it cook down and carmelize to a nice dark color. THEN you add the cinnamon and nutmeg, and THEN you add the sugar, and then it jells and is the most amazing flavored stuff in the world!
Once the juicing pulp had cooked down and darkened, I tried just adding vanilla and cinnamon and sugar, figuring the vanilla might help spark the flavor some. But the lack of apple flavor in it caused the vanilla to sort of get lost. It was sweet, and you could taste the cinnamon, but not the apple. It was the least impressive apple butter I've ever made. I think a little lemon juice would possibly perk it up, or maybe some apple juice concentrate, but that seems rather contradictory since I already removed the juice, and want to use it without having to put it back! Lemon juice will likely be the best I can do.
I have concluded, after two tries, that apple butter made from the pulp from juicing is always going to be pathetic. A mere shadow of the rich apple butteriness that whole apples produce.
So I had to find another way to use them! And I have finally found it!
I stirred a little sugar into the pulp, along with a good amount of good quality cinnamon. Then I added a dollop of vanilla. The funny thing is, I started exactly the same way, but this, this was different, and it worked. I wanted a little lemon juice, to perk it up a bit, but did not have any, and I thought the lime juice that I DID have might have a bit too much of its own personality to work well, so I left it out.
Parchment paper went onto the trays of my food dehydrator. (Tinfoil, teflon sheets, fruit roll trays, or anything else like that, would also work - just make sure you leave room for air circulation around the edges of it when you put it on the tray.)
The glop (there really is no other word for the darkening mass) was spread in rough rectangles onto the parchment paper. I spread it about 1/8" thick. It is fairly stiff, so it really has to be mashed down to spread it.
Dried that for about 8 hours - the new dehydrator is fast, and by the end of that time, which ended in the middle of the night, it was pretty dry. The next morning I fired it up again for about 2 hours to make sure it was dry, and to soften it a bit so it was easier to remove from the trays.
Apple leather. The flavor is mild, but it is sweetly cinnamon and fragrantly vanilla. I still think that a splash of lemon juice - just a splash! would brighten the flavor and intensify it a bit. But this worked!
Where the butter ended up just being LAME, the leather concentrated all the flavors more, and the cinnamon and vanilla carried it nicely.
This time, when peeling and coring the apples, I separated the peels and the cores. I really don't know why it never occurred to me to do that before - perhaps because we were feeding the peels to the rabbits, and the cores to the chickens, I just never thought of doing anything more with the peels. But this time I separated them out.
The peels were also put onto the dryer trays, and I dried them along with the leather. I will store those for rabbit fruit for the rest of the winter. But it occurred to me that I could make them into a treat also.
Next time, I'll sprinkle the peels with cinnamon and sugar before I put them in the dehydrator. Hubs will eat them - he likes cinnamon and sugar, and was actually snitching apple peels from the tray as I was prepping them to dry them. If I give him an excuse, he will eat them after they are dried also.
I know a lot of people who make apple scrap vinegar, but this has never appealed to me (I may have to do it anyway, due to a lack of apples).
For one thing, it isn't REAL apple cider vinegar, it is just a watered down second rate version. It ISN'T in fact "historic" at all, but something invented in more recent times by people who no longer press cider, and for whom fresh unpasteurized cider is something never seen. Real apple cider vinegar was the result of massive cider pressings in the fall, and the cider was stored in barrels where it became progressively harder through several months, then gradually converted to vinegar. Apple cider vinegar was the inevitable result from the hard cider that had not been used quickly enough, which had gone to vinegar by late winter or early spring (depending on temps). It is deeper, richer, and a lot more acidic. I like what is genuine.
I have never made apple scrap vinegar and don't really want to. But I understand why people do. It is what they CAN do, and may end up being all I can do also. But you only need so much vinegar. Even if you are making pickles each year, you still only need a few gallons. There are a lot more apple scraps than what you need for that if you are making applesauce, butter, jelly, pie filling, canned apples, spiced apples, and apple juice!
So then there is apple scrap jelly. Really all you are doing is extracting the juice from the scraps. Cooking them in water until you have a really watered down juice, and then evaporating the water until you have some juice around the scraps. Strain and press out the rest, and toss the pulp to the chickens.
(The chickens sure are getting the short end of the stick here! With each level of frugality, the chickens end up with less and less. When we must though, we must.)
But you also only need so much jelly, and jelly requries pectin (which is expensive if you buy it), because apple scrap jelly, in spite of the high concentration of natural pectin from the peels, still has insufficient pectin to jell without some added pectin. It will candy, but it generally won't jell. (Apple jelly was traditionally made from crab apples, which ARE high in pectin.)
So you COULD also make candy. Just leave out the pectin, add a LOT of sugar (as much sugar as you have juice, once the juice tastes like juice and not like watery juice), and cook it down until it reaches a hard crack stage. Then pour it out into molds, or flat and cut it while it is still barely warm (with a buttered knife). A little cinnamon would probably make it more flavorful.
In between the juice and candy stage, you get syrup. So if you want apple syrup (which you can substitute for honey), you start it just like candy, but cook it to just less than a soft ball stage - to the point where if you drop some on a cold plate, it will only run slowly when the plate is tipped. You know what pancake syrup does on a plate - THAT!
This fall when we were processing apples, we had days when we had buckets full of apple scraps, which went to the animals - far more than they could eat right away. By preserving some of this, they don't get overloaded on them one week, with none for months to follow.
Next year, I'll be doing secondary processing on more of the apples, as long as I have the energy and equipment available to do it (this year I ran out of crock pots!). I'm also going to experiment with more ways to use the scraps, to make them into either tasty bits for us to use, or into stored feed for our animals.
Please email us with your tricks for using apple scraps, and I'll add them here if they are something that would appeal to other people!
What Do I Do With Oranges and Peels
The suggestions below can be applied to any citrus fruit, including Oranges, Sour Oranges (Bitter Oranges, or Trifolate Oranges), Blood Oranges, Limes, Lemons, Grapefruit, Pommelos (though you only want the outer rind in the peel recipes with these), etc.
Oranges do not dry well, they tend to go all to sawdust! But there are other ways to preserve them that result in enjoyable treats.
The oranges can be juiced, and the juice may be canned.
Oranges can be canned. Cut off the peel, just inside the backs of the slices, then work the slices out of the membrane. Can in syrup, or juice a few and can in natural juice. Pineapple juice also works well in place of syrup.
Oranges may be candied. You can do the orange slices without peels, or you can just slice the whole orange with peels, and candy them, the same as you would orange peel (though you skip the rinsing).
You can scrape off the zest, dry it, and use it for baking, in which case you throw away the bitter parts. It can be ground and dried for long term storage.
You can candy the entire peel, in which case the bitter parts get candied also and you prepare it in a way that gets rid of the bitterness. Candied orange peels can be used in place of orange zest in recipes, they can be dipped in chocolate for an elegant gift or treat, and they can be enjoyed plain. You can replace the water in the candy recipe with orange juice for a stronger flavor, or with pineapple juice for a tropical burst.
The syrup from the candied peels can be used to add to jam, or to use for sweetening tea or other beverages.
You can dry peels, chop them up, and use them in potpourri.
You can cut off the zest in large chunks, dry it, and use that for spiced cider blend.
And of course, you can make marmalade with the whole orange.
Oranges are one of the more flexible fruits, and the whole orange can be used for some things.
EASY Rabbit Jerky
This isn't about seasonings. Recipes for jerky seasoning are everywhere. You don't need that. You need to know how to make the process of making rabbit jerky practical.
I've seen two versions:
1. Bone out the raw rabbit, slice the meat thin, apply seasonings, etc.
Bone out a raw rabbit. Ok. That is a ROYAL PAIN to do. WORSE than boning raw chicken! There aren't any big pieces of meat! You'd be slicing up little dinky bits of meat, trying to get them thin enough for jerky. I suppose you could pound them to flatten them, and save a bit of work, but wow. That is a LOT of work for NOT a lot of return!
2. Bone out the raw rabbit, grind, season, use a jerky gun to form strips.
Same thing. That's a TON of work for a bitty amount of jerky!
I don't make rabbit sausage either. I'm sure it is delightful. If I want white meat sausage, I'll make it from chicken or turkey breast meat. I'm just not into fussy, slavish tasks when there is an easier way!
We make rabbit jerky the easy way.
We cut off the belly flaps, and use those to make jerky.
This is a uniformly thin piece of meat anyway. It does make a chewier jerky than ground. Who cares. Jerky is never a fast food to consume anyway.
There are two belly flaps per rabbit. Each belly flap makes a single serving size of jerky. Pretty nice.
Ok, so there isn't much of it. But when you are slaughtering rabbits in batches every few weeks anyway, you have sufficient to make it worthwhile.
I put them in the freezer, in a zip bag until I have enough for a good batch. Thaw them, season, marinate, and then put them into the dehydrator.
It doesn't get any easier than that!
Notice
The information on this site is presented for informational purposes only, and consists of the opinions and experiences of the site authors. It is not to be construed as medical advice or to be used to diagnose or treat any illness. Seek the assistance of a medical professional in implementing any nutritional changes with the goal of treating any medical condition. The historical and nutritional information presented here can be verified by a simple web search.
I do what I do because I understand the science behind it, and I've researched worldwide sources to verify the safety of my practices to my own satisfaction. Please do your own research, and proceed AT YOUR OWN RISK.

Real Food Recipes
- 67+ Fast Meals from Canned or Leftover Chili
- Admit It, You Eat Ramen Noodles!
- All The Tacos
- Awesome Swedish Meatballs (No Mushroom Soup)
- Bean and Bacon Soup (Similar to Campbell's)
- Butternut Squash and Bacon Soup
- Chocolate Marshmallow Fudge Sauce
- Clam Chowder And Seafood Bisque
- Easiest Chicken White Bean Chili Ever
- Easy German Potato Salad
- Family Pizza
- Incredible Tuna Salad
- Lasagna Madness
- Light Split Pea Soup
- Ma's Eggnog (Easy Probiotic Eggnog)
- Mango Chutney
- Muddy River Coleslaw
- Mushroom Steak Sauce
- Old Fashioned Applesauce and Apple Butter
- Old Fashioned Ham and Bean Soup
- Overripe Zucchini and Bacon Soup
- Peasy Leeky Soup
- Plaid Pajamas Hash
- Really Pork and Beans (Not Baked Beans)
- Red Bell Pepper Ketchup
- Refried Beans (for Canning)
- Salisbury Steak WITHOUT Mushroom Soup
- Scratch Soup Without A Recipe
- Scrumptious Maple Oatmeal Pancakes
- Seven Flexible Chili Recipes
- Seven Siblings Knockout Corn Chowder
- Sloppy Beyond Joe
- Southwest Bean Stew
- Tasty, Digestible, Aoudad (Canning and Preserving)
- The Scariest Ever Delicious Pickled Egg!
Related Sites
Interesting Sites